by Dave Workman | Senior Editor
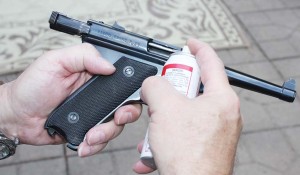
For getting small semi-auto rifles or pistols ready for fall small game hunting, use today’s aerosol cleaners and oils to reach those hard spots without taking the gun apart.
Fall hunting seasons are fast approaching, and for some folks, hunting is already underway with the arrival of mourning dove seasons in several states, and early grouse hunting in several western states.
Now is the time to be doing several of the following:
- Watching the advertising from sporting goods stores with sales on ammunition, which are designed to get people into the stores where their impulse buying kicks in. In order to avoid this trap, make out a shopping list, stick to it, and leave. I have managed to stock up on a couple of years’ worth of shotgun shells using this strategy, and at bargain prices.
- Get in shape. That means getting off the couch and walking around the neighborhood every day, in your hunting boots. It means using the stairs instead of the elevator or escalator. No stairs to climb? Go over to the local high school and run up and down the bleachers. Watch your diet. Eat your greens. Drink your 2% milk.
- Go to the range. Shoot up last year’s ammunition and buy – or reload – new stuff for the 2015 season. Your success or failure may hinge on a single well-placed shot, so make it count.
- If you haven’t taken your rifle or shotgun out of the cabinet or safe since last fall, you’re overdue. Get that gun out, strip it down, clean it inside and out, and apply a very light film of oil to every moving part you can.
- Hone your hunting knives. This is one of the most neglected jobs of all. It requires only a few minutes of time to restore a razor edge to a good knife, and out in the field, that will come in handy.
- Grease your leather hunting boots. I use Hubard’s shoe grease, Sno Seal and Neatsfoot oil interchangeably and my boots have lasted through many years of service.
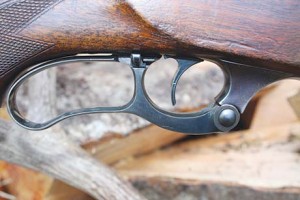
Workman’s fall preparations began in the spring when he put a new lever on his old Model 99 Savage. The project included removing old blue, buffing the steel right down to bare metal, buffing out the pivot screw hole, and re-bluing the lever through several steps.
People who procrastinate about this are setting themselves up for failure; the guy who sits around the campfire and reminisces about the good old days rather than enjoying fresh venison, waterfowl or upland table fare.
Preparing for the hunting season is something of a ritual for outdoorsmen and women. Anticipation is half the fun.
My preparations actually started in February when I went shopping for a lever to fit my vintage Model 99 Savage. It was grandpa’s gun and he gave it to me when I graduated from high school. This fall may be its last trip to the timber country before earning a retirement spot. It has quite a few bucks to its credit—most of them not mine—and it is dead-bang accurate with the right loads.
The lever replacement comes as the result of a bad judgment at a much younger age. Trying to expand the rather narrow interior dimensions of the original lever to fit a bulky glove, I destroyed the finish and the aesthetic lines. After more than 40 years, it was payback time.
I rounded up a lever at a gun show from an old parts guy who had to hunt around a couple of months before finding it stashed away. It needed re-finishing, which gave me a pleasant chore that lasted over several days, carefully working down to bare metal with emery paper, fine steel wool and Dremel with a buffer tip.
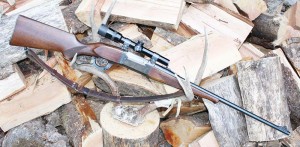
Author will pack along the lever-action Model 99—his grandfather’s rifle—on this year’s deer opener.
Once down to the metal, I degreased everything and cold-blued the part with very good results.
Chambered in the under-appreciated .300 Savage, this rifle will be riding along for the season opener in Washington in October.
Since I own rifles in other calibers, I’ve been getting them all zeroed at the range while on vacation, and then trotting back to the loading bench to put together fresh loads.
Sounds simple, right? Not so fast boys and girls.
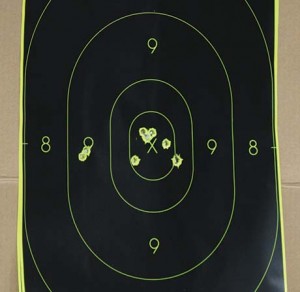
When you zero a rifle for fall, you may find your first shots off to one side or the other. Make the proper click adjustments and “walk” your rounds into the X-ring. If Workman had been shooting at a buck at 100 yards, he’d have a notched tag with this adjusted group!
There is much detail about what needs to be accomplished. Whenever you head to the range to zero a rifle, give it an examination ahead of time. Make sure the scope mounts are tight or that the iron sights haven’t been banged out of alignment. Put a patch down the bore to clean out dust that has settled—trust me, it’s there – since it was put away for the season. Check for any scratches or nicks in the stock if it’s wood, and repair them with some judicious sanding followed by an application of linseed and/or Tung oil.
Now, if you don’t care to go all out on repairing scratches, do this instead: Get a can of neutral shoe wax, warm it up and then take a clean cloth and rub the wax into the scratch. Add a couple of layers of wax to this and if you’ve got a sunny corner, set the gun so the stock gets the sunlight
If your barrel is really dirty, get a new bristle brush and scrub it out with Hoppes’ No. 9 or Outer’s Nitro Solvent. Let the solvent work and then run the brush down again, this time wrapped with a single thin patch. Then run dry patches down, followed by an oiled patch, and finally a dry patch.
Same goes for wingshooters or people who hunt deer with shotguns. You’ve got to get that gun into shape. Clean the bore out and leave it glass smooth. My shotguns get a workout in the fall, but they invariably get a bath of Hoppe’s before they’re put away for the season and in the days leading up to the opener.
While you’re shopping for ammo, be sure to pick up a box or two of clay targets. It’s imperative to brush up on eye-hand coordination and being able to hit a flying target. Birds do not give second chances.
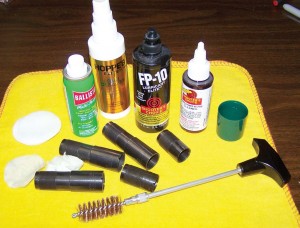
Clean your shotgun and then clean your choke tubes! This is a much-overlooked step for fall hunting preparation.
You should do this practice with the same ammunition you take on a hunt. Different size and types of shot pattern differently. For example, if you are planning to hunt with No. 6 or 7½ lead shot, practice with that. Ditto steel shot.
One thing I’ve found with shotguns that have interchangeable choke tubes is that it’s a good move to take those tubes out and clean them as well, especially along the threads.
Aerosol cleaners are a godsend for lots of people. This is particularly true for folks who own Ruger semi-auto pistols and don’t want the experience of taking them apart and putting them back together. Get a small scrubber or toothbrush and a can of cleaner, and blast away. Clean the breech area, where powder residue accumulates, and the bolt face.
Last fall, I popped a blue grouse at about 25 yards with my little vintage Ruger, and might not have been able to do that with a filthy pistol. Recently at the range, I noticed that the bolt seemed a little dry, so I added a drop or two of light oil, and it’s back up and running like new.
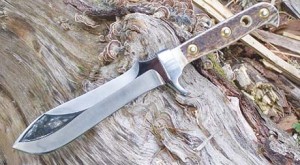
If you have a good knife, or a brand new one, make sure the edge is razor sharp long before you leave for camp. And take along a small sharpener in the field to keep that edge while dressing and skinning.
Aerosols work miracles for semi-auto, pump and even break-action shotguns too. Short of tearing everything apart, you can get cleaning fluids into those little nooks where crud can build up by blasting it in from a can.
For those who don’t have a cleaning kit handy—add that to your shopping list—use a trick grandpa taught me back in the previous century. Take a length of string, say 36 inches long (or shorter for a handgun), and tie a patch at one end and a hairpin at the other for weight. Drop the string down through the bore—the hairpin will take it down—and then pull the patch through, from chamber to muzzle.
For the handloader who hunts, this is the busy time of year. By the time you read this, I’ll not only have been putting together proven loads for my rifles chambered for .30-06 and .308 Winchester, I will also have been to the range to do the final adjustments with the .300 Savage.
This is no time to get hasty and cut corners. I load each round after sizing, measuring and trimming cases and tumbling them, and weighing each powder charge on a Lyman electronic scale. It is important to get each cartridge as close as possible to the one loaded just ahead of it for consistency at the range and in the field.
By sighting a rifle to shoot a couple of inches high at 100 yards, you’re almost certain to be dead on at 200 yards, depending upon the load and caliber. I use boattail bullets exclusively because of their superior ballistics, and have grown rather fond of projectiles with polymer tips. Specifically, the last four deer I’ve shot were all taken with Nosler Ballistic Tips or Accubonds. In the .300 Savage, I have set aside 150-grain Ballistic Tips, and for the .308 I like the 165-grainers. For the .30-06 loads, I’ve settled on 180-grain Accubonds for the kind of shooting I do while hunting along the Snake River breaks.
Hornady also produces a series of polymer-tipped bullets that work rather well, and my hunting partner has had rather good luck with them.
It is extremely important to follow good loading data, which has improved over the years with better propellants and testing equipment. I’ve got about every recent loading manual available, and the advantage is that they’ve all got ballistic tables in the rear. If you know the bullet weight and muzzle velocity, you can pretty well approximate where that bullet will be at 200 or 300 yards, a distance that is crossed in less than a second.
But whether you use Noslers, or go with proven bullets from Speer, Hornady, Sierra or Barnes, the most important thing one can do is to practice, and that means range time.
Here, again, one must do more than just sit down and shoot until the rifle barrel is so hot you can’t touch it. Zero the gun with a cold barrel. That means no more than a three-shot string between allowing the rifle to cool down, and that could take several minutes. In the field, you will be shooting from a cold barrel, and you must duplicate that condition as best as you can.
If you take time between each shot, that will help keep the bore cooler, and you should also rack the rifle so the barrel is pointing upward between strings. Heat will rise out of the bore.
There’s a real quick way to zero a new rifle or your favorite gun with a new scope.
First, be sure your crosshairs are properly aligned in up and down, side to side. If they’re off-center, that will affect downrange accuracy. A couple of years ago, I helped a college student sight in her .270-caliber rifle that they couldn’t get to group properly. One look through the scope told the story. I loosened the rings, rotated the scope until the crosshairs were as close to straight up-and-down, and then carefully tightened the rings. Three shots later, the rifle was zeroed and later that day, she shot a buck at a couple of hundred yards.
To sight in for the first time, set a target at 25 yards and fire one round. Take note of where the bullet strikes, then fire a second shot, and if the bullet punches a hole right next to, or touches the first, adjust your crosshairs accordingly to bring the point of impact into the bull’s eye.
Remember, at 25 yards, it will take 16 clicks to adjust the point of impact one inch if your scope adjusts a quarter-inch with each click at 100 yards. Say your bullets hit three inches low and an inch to the right. That will take a maximum of 48 clicks up and 16 clicks left to adjust. That should put the third shot in the 25-yard bull’s eye. If so, fire another round to confirm that setting, and if it’s still “on,” move the target to the 100-yard mark, while the rifle cools.
Don’t expect X-ring accuracy with the fifth shot, as some fine-tuning will likely be necessary, but you should be pretty close. My experience has been that the first 100-yard shot will land high, again depending upon the caliber, velocity and bullet weight. But if you’re shooting two to three inches high at 100 yards, with the windage being right, then at 200-300 yards, your bullet will be in the vitals. I zero my guns to shoot about 2½ inches high at 100 yards and it has paid off for me repeatedly.
I think the longest shot I ever took on a buck was about 400 yards. That was uphill near the top of an open canyon. I wouldn’t recommend making a habit of that! In the timber, I can’t recall ever making a shot over 125 yards, and most have been well within that.
As noted earlier, far too many hunters ignore their hunting knives and then discover that they’re trying to field dress an animal with a dull blade. For many years, I’ve honed my hunting knives (everybody has more than one, don’t they?) with diamond sharpeners or ceramic sharpeners. I’ve got models from EZE LAP, DMT and Lansky, and all do a splendid job of producing a keen edge.
To produce a razor edge, stroke the blade across the sharpening surface as though you were cutting/slicing away at it, with the blade at as low an angle as possible. You want a sharp, long-lasting edge not a blunt edge with a sharp angle that doesn’t last. By using a cutting stroke (rather than pulling the edge across, which can roll the edge) you’re actually moving steel away from the edge and giving it an even surface.
This is just as important if your knife has a gut hook. Be sure to touch that up with a round sharpener.
Another thing you should have in your hunting gear is a small sharpener to touch up the edge once the work has begun. Nothing dulls a knife quicker than the hair of a game animal. When you open up the body cavity, slide from the center of the rib cage back toward the groin area, to cut in the direction of the hair, rather than against it.
I’ve got an old Model M from EZE LAP that fits inside a brass handle by unscrewing the rod and reversing it into the handle. It fits into a leather scabbard that fits in my backpack. This thing has been in use for more than 25 years and it still restores the edge with a few strokes.
It’s important to have more than one good hunting knife, as you’ll want to get the hide off of your animal quickly as possible to cool the meat, and bag it in a game bag to keep any bugs away.
This is where a really big cooler comes in handy. For the past few seasons, I’ve been boning and cooling the venison by bagging it according to type—roasts, hamburger meat, loins, backstrap—and putting it in a big cooler with ice. That preserves the meat for later processing, which includes removing as much fat as possible with a fillet knife. Marbled fat is good in beef, but surface fat in wild game is where the “gamey” flavor often resides and you want to be rid of it.
That just about covers it. Shoot straight, be sure of your target and what lies beyond it, follow the game regulations, and here’s hoping you dine on wild game through the winter!

