by Art Merrill | Contributing Editor
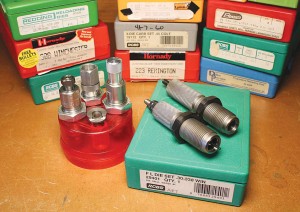
Regardless of the maker, die sets usually have three dies for straight cases and two for bottleneck cases.
We divide metallic cartridge cases into two categories, bottleneck cases and straight-walled cases, each named for their shape. Straight cases for pistol and rifle have been with us a long time, and so have bottleneck rifle cases—but many folks forget that bottleneck pistol cases have been around since the .30 Mauser for the Model 1896 “Broomhandle” pistol. Modern bottleneck pistol cases include the .357 SIG, FN 5.7x28mm and .22TCM.
Because they differ in geometry, the reloading technique is somewhat different between bottleneck and straight cases. The major difference is in the number of dies used, and in the sequence of reloading steps. Regardless of the sequence or the case style, reloading dies still perform the same five functions: they deprime, resize and expand cases, and they seat and crimp bullets.
Resizing is necessary because the cartridge case must be slightly smaller than the firearm chamber to allow the cartridge to easily enter the chamber. On firing the case expands, and the resizing die “squeezes” the case back down to original size to again allow easy chambering when reloaded. Full length resizing of bottleneck cases reduces the case mouth diameter, pushes the shoulder back and reduces the expanded case back to original diameter. Straight cases get the same treatment, minus the shoulder resizing. (The other type of resizing, neck sizing only, is a more advanced technique for specific applications.)
Three dies – more or less
Reloading dies for straight cases come in sets of three. The first die resizes the case; the second deprimes it and expands the case mouth to easily accept a new bullet without damaging the case mouth or the bullet; and the third die seats and crimps the bullet in place. In some sets the first die resizes and deprimes, the second expands and the third seats and crimps the bullet.
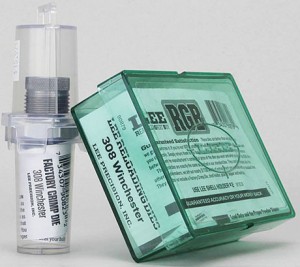
Reloading bottleneck cases can be accomplished with as little as two dies, the first one resizing, depriming and expanding the case mouth, and the second die seating and crimping the bullet in place. Some bottleneck case bullet seating dies, like with the inexpensive Lee RGB die sets, don’t crimp the bullet, requiring a third die for that. And most seating dies can be adjusted to not crimp. Why? Because very often in precision shooting, such as in 1,000-yard Long Range rifle competitions, we often get better accuracy by “soft seating” the bullet without a crimp. Because we single-load only in such competition, crimping bullets is not necessary.
Crimp it
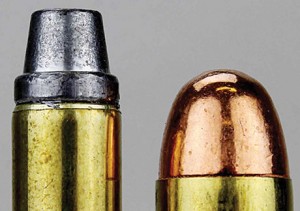
Pistol cases that headspace on their rims get a roll crimp; those that headspace on the case mouth get a taper crimp (L-R .38 Special, .45 ACP).
But this single-loading-only is the exception to the rule; it is imperative that we always crimp bullets in place for all other applications. Failure to crimp can cause bullets to move further into or out of their cases under recoil, causing jams and feeding problems and possibly even raising chamber pressures. In rifles with tubular magazines (such as lever actions) where the bullet nose pushes against the base of the case preceding it, uncrimped bullets will push down into their cases. And simply transporting uncrimped cartridges in boxes or pockets can cause bullets to move into or out of their cases.
Handloaders use three types of crimps. The method of headspacing the specific cartridge determines the type of crimp it requires; the proper crimping method is built-in to the bullet seating/crimping die. Handgun cartridges that headspace on the rim get a roll crimp wherein the case mouth is essentially “rolled” or folded down onto the bullet. Lead pistol bullets have a pronounced “crimping groove” for this purpose—it prevents the roll crimp from damaging the bullet while also ensuring correct overall cartridge length (OAL or COAL) from case base to bullet tip.
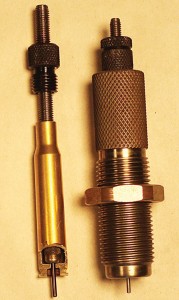
Adjust the resizing die’s decapper/resizer rod carefully. It must punch out the primer without contacting the case head, which can bend the rod.
Jacketed bullets may have a cannelure, a serrated band around the circumference that serves the same purpose. Such bullets, when used in rimless cases that headspace on the case mouth (such as .45 ACP), will get a taper crimp because roll crimping would interfere with precise headspacing. A taper crimp is just what it sounds like; the crimper portion of the seating die is shaped rather like an inverted cone so that the further you push the case into the die, the tighter the crimp becomes. The taper crimp is also typically used for bottleneck cases whether they headspace on the shoulder, rim or belt.
Third is the “factory crimp” that is applied to the bullet at right angles to the cartridge’s long axis in a ring around the case mouth. Cartridges appropriate for taper crimps can get factory crimps instead.
Lee Precision is the major promoter and provider of factory crimp dies. One advantage to the factory crimp is that you cannot deform a case while adjusting the crimp. Another is that if your cases vary a few thousandths of an inch in length, the factory crimp tension remains the same case to case. In taper crimping the tension would vary because the further the case mouth moves into the seating/crimping die, the tighter the crimp becomes, so cases with longer necks will get a tighter crimp than those with shorter necks. A disadvantage is that the factory crimp is done with a separate die, requiring an additional reloading step.
The fourth type of crimp is sometimes encountered on military cartridges, wherein several punches “stab” the edge of the case mouth into the bullet jacket.
Making adjustments
We adjust dies in two ways. The first is by how far down into the press we screw the die, and the second we accomplish with the threaded spindle protruding from the top of the die. Resizing dies are usually made so that proper full length sizing requires the shellholder to just barely touch the die. But to prevent damaging carbide dies with the shellholder, we back the die off the shellholder about the thickness of a piece of paper. With the sizing properly set, now we adjust the spindle to control how far the decapping rod extends into the case. Too far and it will bend the decapping rod against the inside base of the case, not far enough and the decapping pin won’t completely knock the primer out.
The spindle on pistol case expander dies adjusts how widely we “bell” the case mouth. Too much and we split case necks or shorten the number of times we can reload them before they split. Too little and the bullet doesn’t seat easily and the case mouth can damage the bullet jacket or lead surface.
With the seating die we control bullet seating depth with the spindle, and the tightness of the crimp by how far into the press we screw the die.
Dies from different makers differ in their adjustment recommendations, but all new die sets come with specific instructions.
Getting unstuck
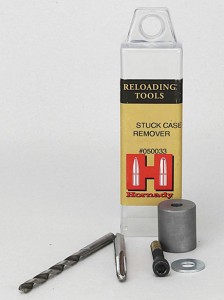
If you handload often enough, sooner or later you’ll probably get a case stuck in the resizing die. Depending on the make of your resizing die, there are a couple of methods for removing the stuck case. First is the direct approach: if possible, remove the sizer/decapper rod from the top of the die and simply drive the case out with a hammer and punch. The second method is to buy a stuck case remover, a kit with which you drill through the primer pocket, thread the hole with a tap and then use a threaded bolt and fulcrum to pull the stuck case back out of the die. You can save your pennies if you already have a tap by substituting a common socket wrench socket and flat washer for the fulcrum. For an online video detailing these procedures, visit http://leeprecision.com/help-videos.html.


